Snuffle Mat

 I recently came across this trend that was apparently really hot in dog circles in 2017 - the snuffle mat. I somehow missed this fad three years ago, but whatever. I found it now!

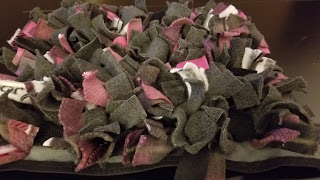
The finished snuffle mat in gray and pink.

You, like me, may be wondering what is a snuffle mat? After doing a little research, I found out that a snuffle mat is basically a nosework toy for dogs. There's a bunch of fleece pieces that form the "snuffle" part where you can hide treats, that your pup then sniffs through to find and eat. 

I've always known that sniffing is an important activity for dogs, and it's why I let my pups do lots of sniffing when we are out. However, I didn't realize there were toys specifically designed for sniffing work, which is awesome when the weather sucks or when they need more nosework. 

I knew that my pups needed a snuffle mat, and moreover, I knew that I could make one! So I did a bit of searching. Most blogs use plastic as the base for the mat, but I wanted to use what I already had on hand and that was washable. I came across this blog, which I used as the foundation for the snuffle mat I made. 

To start, I didn't have canvas. But I did have a plethora of canvas bags! So I found one that was about the size I wanted to make, which was 15" x 15". So I cut out the back of the bag (and cut off the handle - saved that for another project). Then I serged the edges and hemmed them under. 

I used a tote bag from a conference. This one is from AACTE (Teacher Education)Back of the tote bag is the part that I used. Also shown is a pair of fabric scissors.


Next up, I had some fleece leftover from a coat I made a few years ago. So I cut strips that were between 1 - 2" wide and 6 - 8" long. I intentionally cut a variety of sizes to add texture. But it's not necessary; you can make them all the same size if want. 

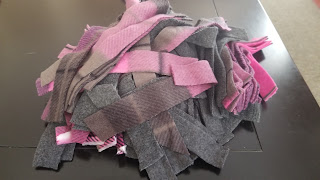
A pile of gray and pink fleece strips.


Once I cut out all the strips, then I tied them into knots in the middle. This part was quite tedious. I may have watched a few episodes of Twilight Zone while I did this.

Pile of fleece strips, each strip has a knot in the middle.

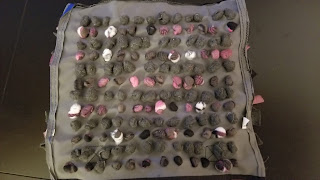
Next up, you need to figure out spacing for the strips. I did 2" from each edge and 1" between each knot. You can see from the picture below that I had a lot of big gaps. If I did this again, I'd probably do 3/4" between each knot. 


Backside of the completed snuffle mat showing all the knots.


So once you figure out what spacing you want, grab your ruler and sharpie and mark out where each strip will go by placing dots on the back. 

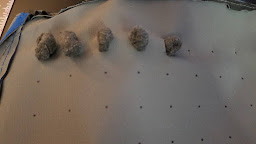
Backside of the snuffle mat with all the sharpie dots in place


Then at each dot, cut a small hole using your scissors. This is a tricky part - you want the hole to be big enough you can push through both ends of the strips, but you don't want it so big that the knot goes through, too!  So start small!  When you pull each piece through the hole, be sure to pull it taut. 

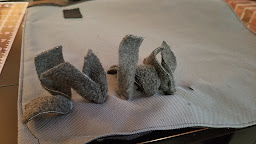
Backside of the snuffle mat showing a few of the fleece knots pushed through.Front side of the snuffle mat showing the fleece strips poked through. They look sparse here but they bunch up when it's done.


This part is a bit tedious as well. I probably watched some Star Trek: TNG for this one. But once you finish, your snuffle mat is all done and ready to use!  To start training your dog on the mat, you may want to put treats on top first. Then as your pup gets used to the snuffle mat, you can begin to hide the treats in mat so they have to work a little more to locate them. Check out my girl learning to use her new snuffle mat in this video: 


Materials: 
  • Canvas bag - Cut out the piece you want to use and finish edges.
  • Fleece - cut into strips (1-2" wide and 6-8" long; I used 144 strips)
  • Scissors
  • Ruler
  • Sharpie
Short Directions:
  • Tie each fleece strip so there's a knot in the middle. 
  • Mark out locations for strips on your canvas bag. Use the ruler to measure and the sharpie to mark the dots. I left about 2" on each edge and had 1" between each dot. If I were doing this again, I would do 3/4" between each dot. 
  • Cut a tiny hole where each dot is. You want this to be big enough you can push the ends of the fleece strips through but not so big that the knot goes through. Start small!
  • On the back side of the canvas, push both ends of a fleece strip through a hole. Pull through and make taut. Continue until your mat is complete.
  • Fluff the mat and enjoy!


Comments